Search This Blog

Showing posts with label Security. Show all posts

Tuesday, May 13, 2014

2 Free Microsoft Windows Server 2012 Antivirus Solutions.


2 Free Microsoft Windows Server 2012 Antivirus Solutions.

Hai phần mềm diệt virus miễn phí cho Windows Server 2012

By default, Windows Server 2012 comes without a security solution.
This is especially important if you use 2012 as a robust workstation OS for your studying needs.
So, to protect your time-consuming lab-rat experiments, you might feel left “high and dry“.
‘Though not everything is lost, since there are 2 hacks you might wish to implement to provide a minimum form of protection to your lab.

1. Microsoft Security Essentials for Windows 7 into Windows Server 2012.

The first hack allows you to install Microsoft Security Essentials (MSE).
Microsoft Security Essentials is designed for Windows 7 and is not compatible (nor supported) on Windows Server 2012.
But if you insist, you might as well end-up installing it on your Windows Server 2012.
  1. Download a copy of MSE from Microsoft: http://windows.microsoft.com/en-us/windows/security-essentials-all-versions
  2. Right Click on the “mseinstall.exe”.
  3. Click on Properties.
  4. Click on the “Compatibility”-tab.
  5. Locate the “Compatibility mode”-section.
  6. Check “Run this program in compatibility mode for:”.
  7. Select From the (now active) dropdown menu “Windows 7″.
  8. Open a Command Prompt as Administrator.
  9. cd to your Downloads folder (ie. cd C:\Users\%username%\Downloads).
  10. Run “mseinstall /disableoslimit” and follow the installer prompts to install MSE on your Windows Server 2012.

2. Microsoft Endpoint Protection 2012 (part of the System Center 2012 suite).

Microsoft Endpoint Protection 2012 is part of a freaking awesome Microsoft System Center suite.
For further info, please refer to http://en.wikipedia.org/wiki/System_Center#Microsoft_System_Center
They are all fully integrated & automated Client/Server solutions that satisfy specific system administration requirements (in addition to the already excellent features provided by Windows Server).
Among those, there’s Microsoft Endpoint Protection 2012, which is a Client/Server Security solution that fully integrates with your Active Directory Domain.
In layman’s words, Microsoft Endpoint Protection 2012 could be considered as the “full” version of Microsoft Security Essentials (aka Windows Defender on Windows 8/8.1).
The solution includes both a “Server” application (ie. to deploy on your application server) and a “Client” counterpart (ie. for your workstations).
  • The hack here is the possibility to run the Client as a “standalone” product (ie. without the Server application).
Not only, you can get the client “for free”, by simply downloading the Trial version of the entire Microsoft Endpoint Protection 2012 suite (trial refers to the Server Application).
To install System Center 2012 Endpoint Protection on Windows Server 2012 proceed as follows:
  • Download Microsoft System Center Configuration Manager and Enpoint Protection 2012 SP1 from the following address:
http://technet.microsoft.com/en-US/evalcenter/hh667640.aspx?wt.mc_id=TEC_105_1_33
Once you obtain the package (mine was named SC2012_SP1_RTM_SCCM_SCEP.exe and it was 613MB):
  1. Right Click on it and open the archive with 7zip.
  2. Extract the “CLIENT”-Folder from SC2012_SP1_RTM_SCCM_SCEP.exe into a temporary location.
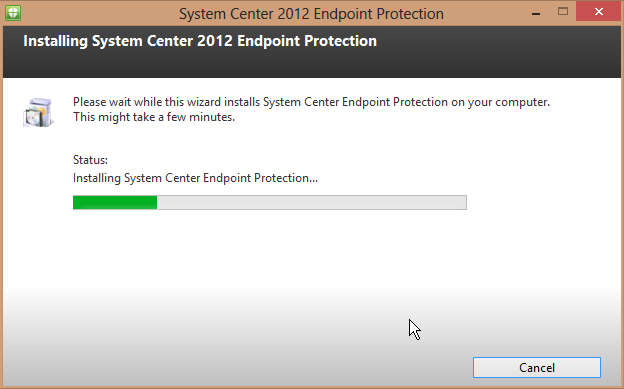
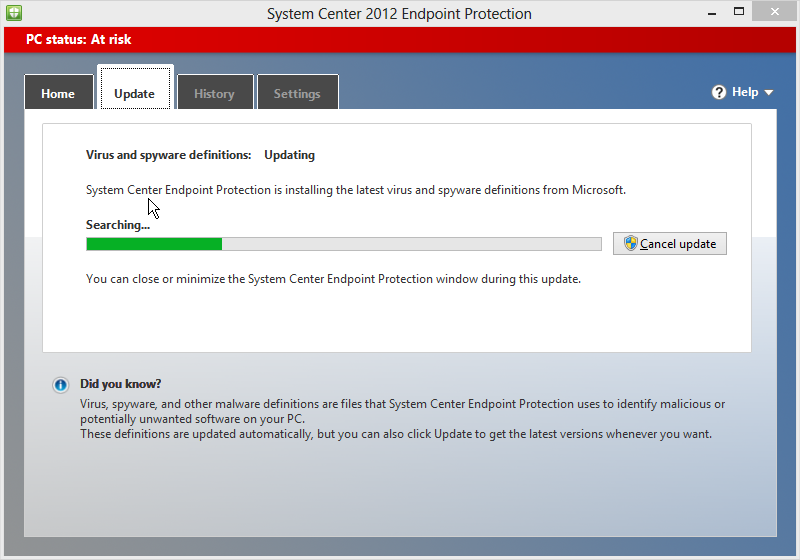
  3. Browse to the CLIENT folder with Windows Explorer and run “SCEPINSTALL.exe”.
  4. Follow the installer Prompts and you’ll end up with a fully featured  Security Solution courtesy of Microsoft.
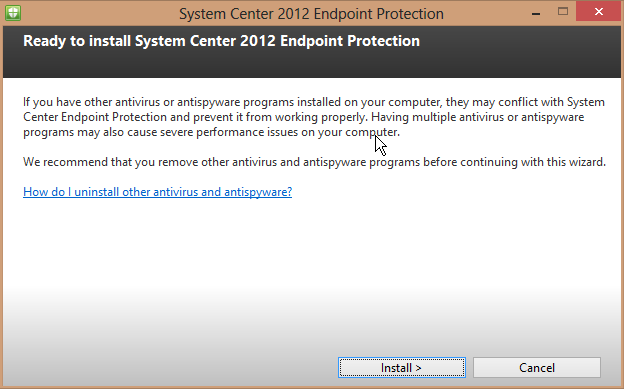
System Center 2012 Endpoint Protection System Center 2012 Endpoint Protection System Center 2012 Endpoint Protection System Center 2012 Endpoint Protection


Personal remarks.

Now, apart from what’s moral and what’s not, Microsoft highly likely wishes you to “give it a go” (at their own Security solutions).
Despite glorious bugs that made glowing news during the previous decade, Microsoft takes a serious stand when it comes to Security.
How?! For one, by constantly releasing Windows “Security Updates”.
Pair that with a basic form of malware protection and you might just end up covering 80% of your security needs.
Independent testing says:”meh..!“.
If you asked me what’s my favourite professional security suite, I’d say:”it depends“.
If you’re an SMB with limited resources (and perhaps close to none IT personnel), then I’d lean towards a fully managed OOB solution (like Bitdefender).
If you’re a Windows-only Enterprise or Government organization, then I’d lean towards a secured Active Directory domain environment (ie. w/Applocker & IPSec), with the integration & automation provided by Microsoft System Center-based solutions (such as Endpoint Protection 2012).
Thoughts welcome.

[UPDATE] 2014-02-12 -- Windows Server 2012 R2 compatibility:

Jens (a reader of this article), reports SCCM 2012 SP1 is not working on his Windows Server 2012 R2.
  • I tried to run MS SCCM 2012 R2 EP Client on Windows Server 2012 R2 Datacenter and it just worked!
So yes, the above procedure is confirmed to work on Windows Server 2012 R2 -- provided you use Microsoft System Center 2012 R2 Endpoint Protection Client.

Updated procedure for Windows Server 2012 R2.

  1. Obtain SCCM 2012 R2 TRIAL from http://technet.microsoft.com/en-us/evalcenter/dn205297.aspx
  2. Extract the SCCM 2012 R2 EP “Client”-Folder from SC2012_R2_SCCM_SCEP.exe.
  3. Run “SCEPINSTALL.exe” as Admin.

http://www.pwrusr.com

Wednesday, April 24, 2013

Hướng dẫn cài đặt và cấu hình Kerio Control version 8

(Setup and config Kerio Control)
(huong dan cai dat va cau hinh kerio control)

Các phiên bản của Kerio Control

  • Software Appliance: phiên bản phần mềm cài trên máy chủ (kiểu kiểu như ISA/TMG hoặc PFsense đó các bạn)
  • Virtual Appliance: cài đặt trên các hệ thống ảo
  • Kerio Control Box: phần mềm được tích hợp sẵn trong phần cứng (kiểu kiểu như CISCO ASA, PIX Firewall)

Yêu cầu hệ thống

Máy chủ

  • Pentium 1 GHz 
  • 1 GB RAM 
  • 100 MB HDD để cài đặt + không gian dành cho logging và bộ nhớ đệm 
  • 2 giao diện mạng (network interfaces) 
  • Các phiên bản Windows 2000/XP/2003/Vista/2008/7 (32 hoặc 64 bit) 

Kerio VPN Client 

  • 256 MB RAM 
  • 5 MB HDD 
  • Windows 2000/XP/2003/Vista/2008/7 (32 hoặc 64 bit) 
  • Debian 5.0/Ubuntu 7.04 (32 bit) 
  • Mac OS X 10.4 hoặc cao trên trên Mac Intel 

Kerio VPN không người dùng (Clientness VPN) 

  • Internet Explorer 7/8 
  • Firefox 3 
  • Safari 4 

Hướng dẫn cài đặt

1. Tải file ISO image từ website của hãng
2. Burn file iso ra đĩa CD/DVD hoặc hoặc boot từ thẻ nhớ USB
3. Boot từ ổ đĩa CD/DVD hoặc thẻ nhớ
4. Hệ thống boot từ đĩa CD/DVD

5. Cửa sổ Please select installation language hiện ra, bạn chọn ngôn ngữ, ấn phím Enter để tiếp tục quá trình cài đặt
6. Hệ thống đang cài đặt

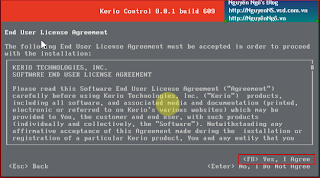
7. Cửa sổ End User License Agreement hiện ra, bạn ấn F8 để đồng ý với thỏa thuận bản quyền

8. Cửa sổ Ready to Install hiện ra, bạn gõ "135" vào ô Confirm, tiếp ấn phím Enter để tiếp tục

9. Hệ thống đang cài đặt

10. Cài đặt hoàn tất, bạn gõ Enter để khởi động lại máy chủ


11. Cửa sổ Local/Administative Network Configuration, bạn chọn Card mạng để đặt IP dùng cho việc quản trị Kerio (thường là card mạng nội bộ - LAN), tiếp ấn Enter


Thiết lập dải IP, đặt cấp phát DHCP tự động, sau đó ấn Enter để hoàn tất

12. Quá trình khởi tạo cấu hình hoàn tất, bạn nhấn Enter để khởi động Kerio Control

13. Địa chỉ để bạn truy cập vào cấu hình
Video hướng dẫn


Hướng dẫn cài đặt (từ hệ điều hành Windows)


Chạy File Setup của Kerio Control

Chọn Custom, Click Next.

Next

Đặt Username và Password quản lý, Next.

Nếu đang cài Kerio Control từ xa, click chọn “I am… remotely”, không thì bỏ qua, click Next.

Clich Install.

 Finish.

Hướng dẫn cấu hình

Từ một máy trạm trong mạng LAN, thiết lập IP về dải 10.10.10.x/24 (hoặc lấy IP tự động từ DHCP do Kerio cấp)
Gõ vào địa chỉ: https://10.10.10.1:4081/admin
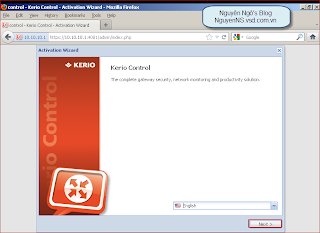
Cửa sổ Kerio Control hiện ra, nhấn Next

Thiết lập múi giờ, thời gian, nhấn Next

Tiếp theo, bạn kích hoạt sản phẩm nếu mua bản quyền, ở đây tôi kích hoạt trial version

Điền các thông tin cá nhân, nhấn Next

Tiếp nhấn Next

Thiếp lập mật khẩu tài khoản quản trị, nhấp Finish để hoàn tất

Nhấp chuột vào Close để hoàn tất
Đăng nhập hệ thống

Hệ thống tạo sẵn 4 Traffic Rule để các máy trạm có thể vào được mạng, các bạn tìm hiểu thêm nhé


Wednesday, August 10, 2011

Chính sách bảo mật cho Web Server

Bài viết này là một phần của bài "Securing Your Web Server", chương 16. Mục đích của bài viết này để định hướng và thực hiện chính sách bảo mật cho Web Server của bạn


Về Patches và Updates:


Các Tool cho IIS
  • IISLockdown phải được setup và chạy trên server
  • URLScan phải được setup, tinh chỉnh và chạy trên server


Về các ứng dụng
  • Phải disable các ứng dụng không cần thiết
  • Các ứng dụng phải được chạy với account có quyền tối thiểu
  • Các ứng dụng như FTP, SMTP, và NNTP phải disable nếu không sử dụng
  • Phải tắt Telnet
  • ASP .NET Service State phải được disable và không dùng bởi bất kì ứng dụng khác. Vào Start > Run > gõ services.msc, tìm service ASP .NET Service State để kiểm tra chắc chắn service này được disable.


Về Protocols
  • WebDAV phải được tắt nếu không sử dụng hoặc phải được sucure nếu cần. Thông tin về WebDAV, các bạn có thể xem thêm tại Microsoft Knowledge Base article 323470, "How To: Create a Secure WebDAV Publishing Directory"
  • TCP/IP phải được config kỹ.
  • NetBIOS and SMB phải được disabled (đóng các ports 137, 138, 139, và 445).


Về Accounts
  • Những account không sử dụng đến phải được xóa bỏ
  • Phải tắt (disable) account Guest.
  • Account Administrator phải được đổi sang tên khác, và phải đặt password phức tạp
  • Account IUSR_MACHINE phải được tắt nếu không dùng đến
  • Nếu các ứng dụng cần quyền anonymous access, các bạn phải create account anonymous này với quyền thấp nhất có thể
  • Những account anonymous không được phép có quyền write vào thư mục web và không được truy cập vào những ứng dụng bằng command line
  • Các account chạy ứng dụng ASP.NET phải được thiết lập với quyền thấp nhất. (Chỉ áp dụng khi bạn không dùng account ASPNET - account mặc định chạy ứng dụng ASP.NET với quyền mặc định thấp nhất)
  • Phải có chính sách về account và password phức tạp thiết lập trên sever.
  • Phải remove group Everyone trên policy "Access this computer from the network"
  • Các account quản trị phải được đảm bảo tính bảo mật, không chia sẽ thông tin các account này.
  • Null sessions (anonymous logons) phải được tắt
  • Group Administrator không tồn tại quá 2 accounts.
  • Remote logon phải được đảm bảo secure cho account Administrators.
Về Files và cấu trúc thư mục
  • Tất cả các partition phải được setup NTFS
  • Thư mục Web phải được đặt ở partition khác với partition chứa files hệ thống
  • Log files phải được đặt ở thư mục hoặc partition khác với 2 partition chứa Web và Files hệ thống
  • Group Everyone phải được thiết lập để không có quyền truy cập vào thư mục chứa files hệ thống như \Windows hay \Windows\System32 ... đồng thời cũng không có quyền truy cập vào Thư mục hay partition chứa Web
  • Account Tnternet Guest phải được thiết lập tuyệt đối không có quyền write vào thư mục chứa Web
  • Remote IIS Administration phải được xóa hay disable (\Windows\System32\Inetsrv\IISAdmin).
  • Resource Kit Tools, Utilities, và các SDKs phải được xóa bỏ hay disable
  • Các Sample của IIS phải được xóa (\Windows\Help\IISHelp, \Inetpub\IISSamples).

Shares
  • Những shares không cần thiết phải được removeAll unnecessary shares are removed (including default administration shares).
  • Group Everyone không được thiết lập để có thể truy cập vào các shares
  • Các Administrative shares (như C$ D$ E$ ... và Admin$) phải được xóa nếu không cần thiết (Chỉ có Microsoft Management Server (SMS) và Microsoft Operations Manager (MOM) sử dụng các Shares trên).

Ports
  • Cấm truy xuất internet cho Web Server (đóng các outbound port 80, 8080 ... hoặc có thể remove Internet Explorer)
  • Intranet traffic phải được mã hóa (ví dụ mã hóa với SSL)

Registry
  • Remote registry phải tắt.
  • SAM phải được bảo vệ (HKLM\System\CurrentControlSet\Control\LSA\NoLMHash).
Các chính sách sau chỉ áp dụng cho StandAlone Server

Logging
  • Login failed phải được server ghi nhận.
  • IIS log files phải được thay đổi đường dẫn và phải được bảo vệ.
  • Dung lượng log files phải được thiết lập thích hợp.
  • Log files phải được kiểm tra thường xuyên.
  • Các truy cập vào Metabase.bin phải được ghi nhận.
  • IIS log phải được configured dạng W3C.

Sites and Virtual Directories
  • Web sites phải được đặt ở partition khác với partition chứa system (non-system partition.)
  • "Parent paths" phải được disable.
  • Các virtual directories nguy hiểm như IISSamples, IISAdmin, IISHelp, và các Scripts virtual directories phải được remove
  • MSADC virtual directory (RDS) phải được remove hoặc được bảo vệ
  • Các Virtual directories cho phép truy cập anonymous access phải disable quyền Write và Excute
  • Chỉ set quyền write cho những folders yêu cầu có authentication (dùng SSL nếu cần thiết)
  • FrontPage Server Extensions (FPSE) phải được remove nếu không dùng đến.

Script Mappings
  • Nên chuyển (mapping) các Extensions không dùng đến sang 404.dll (ví dụ như .idq, .htw, .ida, .shtml, .shtm, .stm, idc, .htr, .printer).
  • Những extension không cần thiết của ASP.NET nên mapped đến "HttpForbiddenHandler" ở Machine.config.

ISAPI Filters
  • Những ISAPI filters không cần thiết hay không dùng đến phải được removed

IIS Metabase
  • Truy cập vào Metabase phải được ghi nhận và phải được giới hạn bằng cách dùng NTFS permissions (%systemroot%\system32\inetsrv\metabase.bin).
  • IIS banner information phải được giới hạn sử dụng


Other Check Points
  • IISLockdown và URLScan tool phải được setup và chạy trên server
  • Remote administration phải được bảo vệ và mã hóa (SSL). Nên thiết lập low session time-outs và account lockouts.

Hạn chế DOS và Những điều không nên thực hiện ở Web Server
* Phải setup Web Server như một server riêng biệt
* Nơi đặt server phải được bảo vệ nghiêm ngặt (physically protect)
* Thiết lập các anonymous accounts khác nhau cho từng application khác nhau
* Không nên install IIS server trên một domain controller
* Không nên kết nối internet cho IIS server khi chưa thiết lập kỹ các chính sách security
* Không cho phép Group Anyone truy cập Locally. Logon Locally chỉ nên có 1 group duy nhất là Administrators

LDP - Nhất Nghệ

Wednesday, May 25, 2011

Auditing Users and Groups with the Windows Security Log

Active Directory is one of the most important areas of Windows that should be monitored for intrusion prevention and the auditing required by legislation like HIPAA and Sarbanes-Oxley. I say that because Active Directory is home to objects most associated with user access: user accounts, groups, organizational units and group policy objects. This article deals with monitoring users and groups using the Windows Security Log.
New user accounts are important to audit to verify that they correspond to a legitimate employee, contractor or application. Outside intruders often create new user accounts to facilitate continued access to the penetrated system. Certain changes to user accounts are important to audit since they can be a tip-off to compromised accounts. For instance, both insider and outsider computer criminals often gain access to a system by socially engineering the help desk to a user’s password. Or a previously disabled account being re-enabled may be suspicious depending on the history and type of the account. Group changes, especially changes to the group’s membership, are very useful to track since groups are used to control access to resources, link security policies and control wireless and remote access all over a Windows network. Changes to an organizational unit’s Security tab usually corresponds to delegation of administrative authority over that OU but also occurs when you change normal user access to directory objects. Examples include delegating password reset or user account creation authority over the NYC OU. Any change to a group policy object or changes to the Group Policy tab of an OU, can result in wide reaching changes to the security policies applied to the computers in that OU or changes to desktop restrictions for the user accounts in that OU. In this article I’ll focus on auditing changes to users and groups.
To track changes to users and groups you must enable “Audit account management” on your domain controllers. The best way to do this is to enable this audit policy in the “Default Domain Controllers” GPO which is linked to your Domain Controllers OU as seen in figure 1. “Audit account management events” provides specific event IDs for important operations that can be performed on users and groups.   

User account auditing

The basic operations of creation, change and deletion of user accounts in AD are tracked with event IDs 624, 642 and 630, respectively. Each of these event IDs provides the name of the user who performed the operation and the name of the user account that was affected as you can see below in the example of event ID 642 which was taken from a Windows 2000 domain controller:
User Account Changed:
 -
 Target Account Name:alicej
 Target Domain:ELMW2
 Target Account ID:ELMW2\alicej
 Caller User Name:Administrator
 Caller Domain:ELMW2
 Caller Logon ID:(0x0,0x1469C1)
 Privileges:-
Note that event ID 624 (user account created) replaces “Target” with “New” in the above sample. For changed user accounts, Window 2000 sometimes documents the type of change made to the account in the first line after “User Account Changed”. With Windows Server 2003, Microsoft added a bunch of new fields to the description of event ID 642 as shown below.
User Account Changed:
 -
 Target Account Name:alicej
 Target Domain:ELMW2
 Target Account ID:ELMW2\alicej
 Caller User Name:Administrator
 Caller Domain:ELMW2
 Caller Logon ID:(0x0,0x1469C1)
 Privileges:-
 Changed Attributes:
 Sam Account Name:-
 Display Name:-
 User Principal Name:-
 Home Directory:-
 Home Drive:-
 Script Path:-
 Profile Path:-
 User Workstations:-
 Password Last Set:-
 Account Expires:9/7/2004 12:00:00 AM
 Primary Group ID:-
 AllowedToDelegateTo:-
 Old UAC Value:-
 New UAC Value:-
 User Account Control:-
 User Parameters:-
 Sid History:-
 Logon Hours:-
In the above example you can see that Administrator set Alicej’s account expiration date to 9/7/2004. These new fields are a real advance since Windows 2000 was pretty inconsistent about which account property changes it documented and which it left blank in the event’s description. Sometimes all you knew was that the account was changed but not what changed. Most of the fields are self explanatory but “Old UAC Value” and “New UAC Value” bear some discussion. UAC stands for user account control and is a 4-byte field whose bits correspond to the check boxes on the user’s account seen in figure 2. At first I thought it was necessary to isolate the individual check boxes from the UAC value. However that is not necessary because the next field, User Account Control, graciously lists in plain English which options where checked or unchecked. For instance in the case of a user account being enabled, User Account Control specifies “Account Enabled”.
Windows Server 2003, and to a lesser degree Windows 2000, also has a number of event IDs devoted to specific user account maintenance operations. When a user changes his own password Windows Server 2003 logs event ID 627, “Change Password Attempt” as shown below.
Change Password Attempt:
 Target Account Name:bob
 Target Domain:ELMW2
 Target Account ID:ELMW2\bob
 Caller User Name:bob
 Caller Domain:ELMW2
 Caller Logon ID:(0x0,0x130650)
 Privileges:-
When an administrator resets some other user’s password such as in the case of forgotten password support calls, Windows Server 2003 logs event ID 628.
User Account password set:
 Target Account Name:harold
 Target Domain:ELM
 Target Account ID:ELM\harold
 Caller User Name:timg
 Caller Domain:ELM
 Caller Logon ID:(0x0,0x158EB7)
Notice that the “caller” fields identify the user, timg, who reset the “target” user account, harold. Windows 2000 acts a little differently. Despite MS documentation, Windows 2000 logs event ID 627 for both password resets and password changes by the same user. To distinguish between password changes and resets, compare the caller username to the target user name. If they match, you know that the user changes his/her own password.
When Windows locks a user account after repeated logon failures, you’ll see event ID 644 in the security log of the domain controller where the logon failures occurred. 
User Account Locked Out:
 Target Account Name:alicej
 Target Account ID:ELMW2\alicej
 Caller Machine Name:W3DC
 Caller User Name:W2DC$
 Caller Domain:ELMW2
 Caller Logon ID:(0x0,0x3E7)
When the user contacts the help desk or administrator to have his password reset, Windows Server 2003 logs event ID 671, “User account unlocked”. Windows 2000 does not log this event. 

Group auditing

Auditing changes to groups is very easy. Windows provides different event IDs for each combination of group type, group scope and operation. In AD, you have 2 types of groups. Distribution groups cannot be assigned rights or permissions. Distribution groups are reserved exclusively for distribution lists in Exchange 2000. In the security log distribution groups are referred to as “security disabled” groups. Security groups are the more familiar type of group and the only group type that you can assign permissions and rights. Security groups are referred to as “security enabled” groups in the security log. Groups also have 1 or 3 scopes: Universal, Global and Local. The chart below illustrates the difference between the 3 scopes.
Scope
Can have as members Can be grantedpermissions
Universal Users and global or universal groups from any domain in the forest Anywhere in the forest
Global Users and other global groups  from same the domain Anywhere in the forest
Domain local Users and global or universal groups from any domain in the forest and domain local groups from the same domain Only within the same domain
Windows logs 5 different event IDs for each group type and scope combination. The 5 events correspond to the 5 operations Windows audits for each group: creation, change, deletion, member added and member removed.
Type
Scope Created Changed Deleted Member
Added Removed
Security Local 635 641 638 636 637
Global 631 639 634 632 633
Universal 658 659 662 660 661
Distribution Local 648 649 652 650 651
Global 653 654 657 655 656
Universal 663 664 667 665 666
From an access control auditing perspective, the most important column would have to member added since that operation usually corresponds to a user being granted new access.
As you can see, “Audit account management” provides a wealth of information for tracking changes to your users and groups in Active Directory. Remember though, you must monitor and/or collect these events from each domain controller within your domain since the only domain controllers that logs an account management event is the one where the change was actually executed. While a change to a user or group does get replicated to all the other domain controllers, replication does not trigger any events in the security log. For effective use of the security log you need someway of collecting events into a single database for monitoring and reporting purposes using some home grown scripts or an event log management tool such as GFI’s LanGuard SELM.